Sponsor

Patrons


Official Suppliers
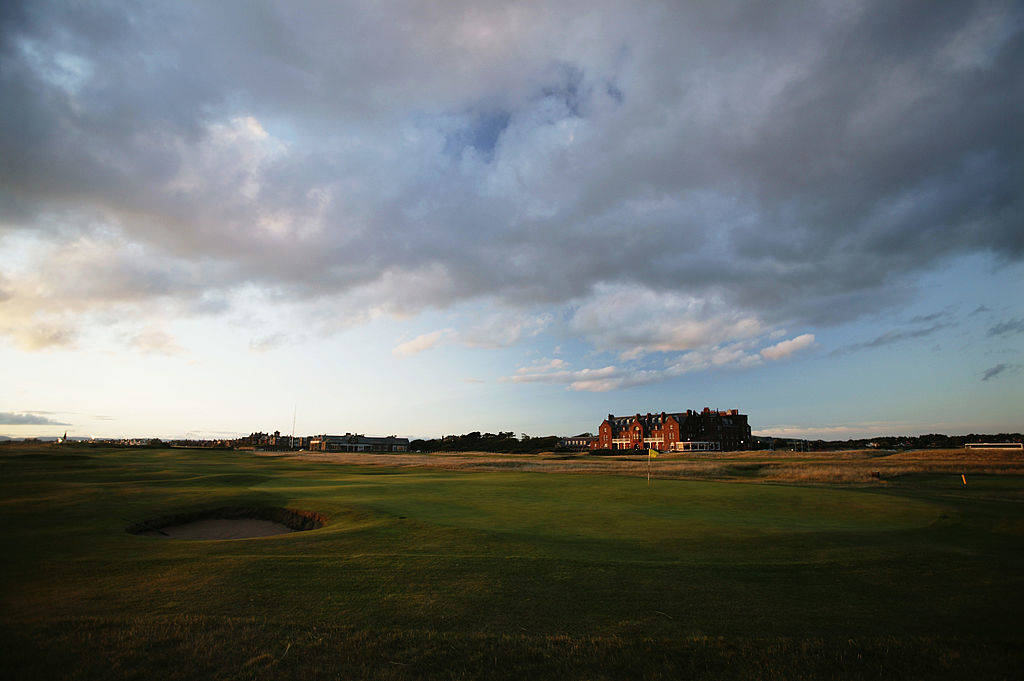
Royal Troon
If you can find the generous fairway on the first, then Seal is a relatively straightforward opening hole, one that often plays straight downwind. It sounds simple, but if players let their nerves get the better of them on their opening tee shot and fail to find the fairway, this hole will show its teeth. Bunkers on the left side of the fairway gobble up wayward aggressive tee shots while poorly positioned shots down the left or right will lead to a tough approach shot, given the greenside bunkers on the front left and right of the green.
More frequent and well-positioned bunkers make this tee shot slightly tougher than the first. The traps can prevent a player from reaching the green in two, due to their severe faces. Accurate players, however, will again be rewarded and can attack pin positions all over this green. The first seven holes at Royal Troon usually play downwind and off the right, offering up scoring opportunities, and Black Rock is no exception.
Players will need to avoid the burn meandering through the middle of the fairway on the third. Provided they do so and hit down the right, they will be rewarded with a great birdie chance. Gyaws is the least protected green so far in terms of bunkers, but run-off areas will funnel loose shots into them with merry frequency. If players are under par through the first three holes, they will be happy with their start.
If the fourth stands out as a birdie opportunity, things certainly get tougher at the par-3 fifth. Again, players who have a tendency to go left will struggle the most, with a collection of pot bunkers waiting. A well-positioned bunker also represents a danger to the front right of the green, and players will struggle to access tucked-away pins with the wind typically behind them.
The seventh is visually stunning from a slightly raised tee, and the first hole at Royal Troon to be played directly away from the sea. Tel-El-Kebir is not an overly long hole, and most players will be able to take a long iron or fairway wood from the tee, but the challenge on this hole is accuracy. An array of fairway bunkers intimidate players from the tee, while the green is among the longest and narrowest on the course. Despite its many perils, if you play this hole accurately you will be rewarded with a fair birdie chance.
The most famous hole at Troon and one of the most iconic in the world of golf. Although short in length, it can strike fear into the heart of even the best golfers. That fear comes from a number of factors, including the usual headwind, the small size of the putting surface - which accounts for the hole's name - and the deep bunkers that protect it. There have been many famous moments on this hole, and many infamous ones too. If they were offered four pars on the Postage Stamp at the start of the week, most players would take it.
The Monk is a tricky hole to close out the front nine, and will typically signal the end of the downwind holes at Royal Troon. Although fairly generous off the tee, the ninth is not short in length and the green is tricky with run-off areas on both sides. Players who manage to avoid the perfectly placed pair of bunkers to the left of the fairway from their tee shot will usually have a blind second shot into the green, which is sometimes difficult to hold downwind. Make par here and prepare yourself for a stretch of incredibly tough holes, starting from the 10th.
The opening challenge of Royal Troon's famous back nine, it is not hard to see how Sandhills got its name. Players off the back tees will be faced with a daunting carry over large sandhills, with trouble awaiting any shot struck poorly. Depending on the tee position for the day, players may face a simpler tee shot, but that does not make the second any easier. Played well uphill to a narrow raised surface that will swat away any shot even a yard right, this green is desperately difficult to hit even with a wedge.
While Sandhills is difficult, The Railway takes the honour of being the hardest hole at Royal Troon and one of the toughest in golf. Once again, a significant carry is required from the back tees to a fairway angled away to the right. The ideal line involves a carry over gorse bushes and the bravery to not be put off by the out-of-bounds railway line running tight along the right-hand side. While the opening shot can vary in difficulty depending on tee position, the second remains devilish in all circumstances, with the railway line always in play, gorse bushes down the left-hand side and a lone greenside bunker awaiting any shots that 'bail out'. The process to make par at the 11th is simple; you will need to hit two of your best shots of the day. That is easier said than done, especially considering the hole usually plays straight into the teeth of the wind. A par here will feel like a birdie.
While the 12th hole is slightly easier than the previous two, it can hardly be considered a reprieve. With intimidating gorse bushes in play off the tee on a hole of fair length, it takes a confident player to hit a good drive on The Fox. Once the tee shot is away, the approach is more fiddly than brutish, Although the green itself provides the main challenge on this hole, players will do well to find the surface in the first place instead of the two gaping bunkers either side of it. Take a four here, and you will be fairly happy.
“I love playing golf courses in that area and links style golf courses so I'm really excited for this year at Royal Troon.” Kristen Gillman
“I'm extremely happy the event will be on links this year. Royal Troon is a fantastic golf course and I'm really looking forward to playing it.” Georgia Hall
“I've heard many good things about Royal Troon, and obviously everyone has heard of the golf course and knows how good it is.” Hannah Green
Continuing the trend of tough holes on the back nine, Burmah is another tricky test. Usually played into a crosswind, the dog-leg fairway can at times seem almost impossible to hit. Find that slither of fairway, though, and the hole becomes much simpler, partially due to its lack of bunkering. Finding the green is still no easy feat, as the target is small and raised. At this point, Royal Troon is truly showing its teeth, and there is yet more difficulty to come.
A difficult par-3 following on from a number of brutal par-4s. This hole usually plays back into the headwind, slightly out of the left, and, although not a long hole, can wreak havoc on scorecards. Club selection is especially important on the 14th, with bunkers lurking short and the green widening out long. Despite the yardage, par is not to be sniffed at here, and Alton can certainly hit back if you do not strike your tee shot perfectly.
Another hole, another daunting challenge on the back nine at Royal Troon. This time, Crosbie offers up another difficult tee shot, albeit one that is at least straighter than on some of the previous holes. That does not make it any easier, with hazards in full view, be it the scattering of fairway bunkers or the heavy rough down the left. You will often be faced with a blind second shot to a green a fair distance away, with bunkers protecting the left-hand side. There is room down the right, utilising the contouring, but that requires a significant carry as a well-placed bunker is there to gobble up poorly struck shots. Another testing hole where par is a good score.
The first genuine respite of the back nine arrives at the 16th with Well. The first par-5 since the 6th, this hole provides some much-needed relief to players battling to save par, and provides a very good birdie chance, despite usually playing against the wind. Yet even the 16th provides no free handouts, as a perfectly placed burn that cuts through the centre of the fairway can often take driver out of the hands of all but the longest hitters. This leaves a very long second shot, which can render the green out of reach. A cross bunker ensures a hit-and-hope strategy will likely fail too, ensuring most players will be left with a shot of between 80 and 100 yards to possibly the most abundantly bunkered green on the course. A birdie chance, for sure, but you most certainly will have to work for it.
After the long 16th, players reach the final Par 3 on the course. Whilst Postage Stamp and Alton are considerably shorter in length, Rabbit shares many of the characteristics that make the Royal Troon par-3s such a special triumvirate. With the pressure mounting for all the leading players in the AIG Women's Open, it will be critical that they can retain their composure and hit a penetrating shot into the heart of this green. Failure to do so, with what will often be a wood back into the wind, will likely result in a visit to the sand as three cross bunkers and a devilish greenside pot bunker leave some of the toughest up-and-downs on the course. Negotiate this hole with a three, and the run for home is nearly over.
The final chapter of a wonderful 18 and testing back nine, Craigend has all the hallmarks of a great finishing hole. Three bunkers down the left at 25-yard intervals ensure that anything leaked left off the tee will be lucky to avoid penalty. A further bunker down the right at driver length will persuade many to lay up, especially with the AIG Women's Open on the line. From the centre of the fairway, a mid-to-long iron will await, with a well-bunkered green short and right. Fail to carry the cross bunkers short of the putting surface and a likely five awaits, while anything leaked slightly right at all will usually bring the same result. With out-of-bounds lurking behind the putting surface, there are no easy shots until your ball is on the green. No shortage of drama awaits on the 18th at Royal Troon.